Friday 20 February 2015

House of Crafts: Candle Starter Kit Review

Okay, time to update this blog with something new and different!

I have always loved crafts, just bring able to are things for yourself and being proud of what you have produced. Obe thing I have never done but wanted to us make my own candles. Now I do love candles, I have my reservations about the safety of them, but when you are using them safety and caution, I love them. I love the different colours and smells and looks. Yes you're typical girl here. But just watching a flame flicker will always be somewhat magical...

Okay enough with the soppy stuff. This is a review of the House of Crafts Candle Starter Kit and my first attempt at making candles. Let's go!


Okay so why did I choose House of Crafts Candle Starter Kit?

I remember always seeing this kits around, especially when I was younger and it look an OK kit to get a feel for making candles. They had other candles kits, but I felt the starter kit was the best place to start for a novice. Only after purchasing did I read the reviews on Amazon. I am still glad I purchased it despite agreeing with some of the negative reviews though.

What do you get inside the box?

Inside the box you get a bag of candle wax flakes, it's probably enough to to make 4 candles with the moulds you get. The moulds are quite tough plastic sort of material and you get a star and a round one. You get two colour dyes, blue and yellow which you can mix together if wanted. You get two bits of dowels which seem to be lollipop sticks. There also a good length of wick which you can use quite a few times and some mould sealer which is reusable. The mould sealer is basically a glorified blue tack.

How I made the Candles.

There are instructions included in the packet which are pretty easy to follow.

 NOTE: Make sure you follow all the safety advice and for children, adult supervision will be needed. (The product is not recommended for under 14s on the box).

First I had to coat the inside of the mould in washing up liquid to make it easier for the candle to be released at the end. This was difficult with shape of the moulds given but it makes all the difference at the end.

Next  I had to make a small incision in the top of the moulds so that the wick could go through. A lot of reviews weren't happy with this part, and I have to agree. It was difficult to make the incisions, we tried with scissors but reverted to using a knife instead. The mould was quite tough material, however it would crack easily once you have made the hole. I think it would not have been too difficult to either include a tool to make it easier to pierce the mould, or have the moulds come with the holes in the first place. Luckily the mould sealer comes in handy if you make a too big hole or split the mould a little.

Next you have to thread the wick through the mould, using the mould sealer to fix it on the outside and then tie it to the lollipop stick the other. I found this easy for the first one, but difficult for the second one as trying to make the wick tight after tying it on the lollipop stick was fiddly. As with the most of the kit, it was pretty easy but some bits were a bit more fiddly than others.

When melting the wax you can't directly heat the wax itself. I used two saucepans, the larger one filled with water and then a smaller one on top with the wax in. I ended up using half the wax to make two candles, however the instructions don't tell you how much to use which is frustrating and ended up with me having to melt more wax a couple of times to get the amount required for the moulds to be full.

With melting the wax you add in a couple of the chips of dye depending on the shade of colour you want. A tiny amount would make the colour quite bright so you don't need anywhere near as much dye as they give you, but the extra dye I will find uses for in the future.

It was important to keep stiring the wax and once the last bit is melted to take it off the heat. This was the bit I then got stuck on. You have to allow the melted wax to cool a little, but not so much that the wax begins to set. Trying to get the timing right on this I found difficult, a few times I had to heat it back up a little again.

I poured the wax straight from the saucepan into the mould which was probably not the best idea as we lost some wax that way. The box comes with a cardboard stand that the moulds can sit in, I suggest keeping it in the box to prevent getting wax everywhere. Next time I will perhaps pour it into a jug, or maybe purchase a candle making jug that is often used to melt the wax in.

Once the moulds are full I left it to dry for a few hours whilst at work. Sometimes the wax will shrink a bit when cooling so they advice you to top the candle up with a little bit more melted wax.

Getting them out wasn't too difficult, Although when you cut the wick the sticks that the wick in place are pretty much rendered unusable after.

I was happy with the end results, you can dip them in melted wax after to make them a bit less dull and more smooth, but I wasn't as fussed about that.

Next came the lighting test. One of them lit pretty easily but both of them kind of crackled when I first lit them. I don't know if thats okay though. The second one had some trouble lighting, we found it kept going out after a few seconds. But after a few attempts it managed to light back up again. As candles they are simple and good. I would have preferred some scents to add in, but I think the other kits offer that.

Pictures


Pros and Cons

+ Great for starters who don't know much about candle making and want to see if they want to do more candle making in the future.

+ Cost. I got the box for about a tenner on amazon which I was quite happy to pay.

+ You get to make your own Candles :D

- The products in the box could have been a bit better. e.g.: Holes already there for the wicks and a couple more wick rods, because I now have everything apart from them to make another set of candles with.

- Instructions would have been helpful with measurements for how much to melt of the wax.

* It would be good to offer in the future youtube video links  via a QR Code to view how to make it*


All in All I am glad I brought the product despite it's flaws. I really enjoyed learning how to make candles and can't wait to try some more. I think I may prefer wicks that already have the metal base and glass jar candles more in the future though as I found do candles in moulds this way was a bit too fiddly.


Wednesday 16 July 2014

Baking Haul

I thought I would do something a bit different. Recently I went a bit made, picking up as much baking stuff as possible. This may be a long post, so sit tight and enter a baking shoppers heaven. I have brought a couple more things not featured in this haul recently which I plan to use for a big bake at the end of this week! Included in that shop is Yellow ready to roll icing, Silver dusting powder (I think that is what it's called) and some black food colouring. Hopefully that will keep you guessing, and hoping it all goes to plan, you guys will see the results soon!
So the Haul!
First up is new baking trays! Always useful! the two below are from pound land and are both 12' x 11' or 30cm x 27.5 cm. 


More trays! These are individual ones, perfect for me and my boyfriend as I'm veggie and he isn't means that I can be happy with non contaminated food. It also makes it easier for my small portions of food in comparison to his large ones! haha. These I got from Lakeland, I have a feeling they were on offer. I love everything about Lakeland and if I could afford to I would spend so much there!!! If you can't make out in the picture, these trays are 18x24 cm or 7' x 9.5' 

Also from Lakeland I brought some food colouring, I chose Lemon Yellow, Sky Blue and Leaf Green. Looking forward to messing around with these :)


Lakeland again! They had a sale on bakeware and I couldn't resist, they also sent me a £5 off when you spent £30 which I couldn't not use! These two are Hemisphere Moulds. They were only a few pounds each on sale and I thought would be tonnes of fun to play around with. I brought a small and Individual sized one, not being sure on the sizes. I wish I brought some of the bigger ones as well in the sale. But we shall see how these two go. I am hoping to do something with these soon, in my big bake. So lets see what happens ey? :)


A variety of chocolate products! I can't help but pick up something in home baking section when going past it in the supermarket! I have managed to collect these three recently. I brought Dr. Oetker white and milk chocolate chunks, as well as ASDA's chosen by you range, dark chocolate drops. I mostly buy ASDA home baking stuff but I am very very bias, working there and it being my local supermarket has a very heavy influence on my buying habits! 


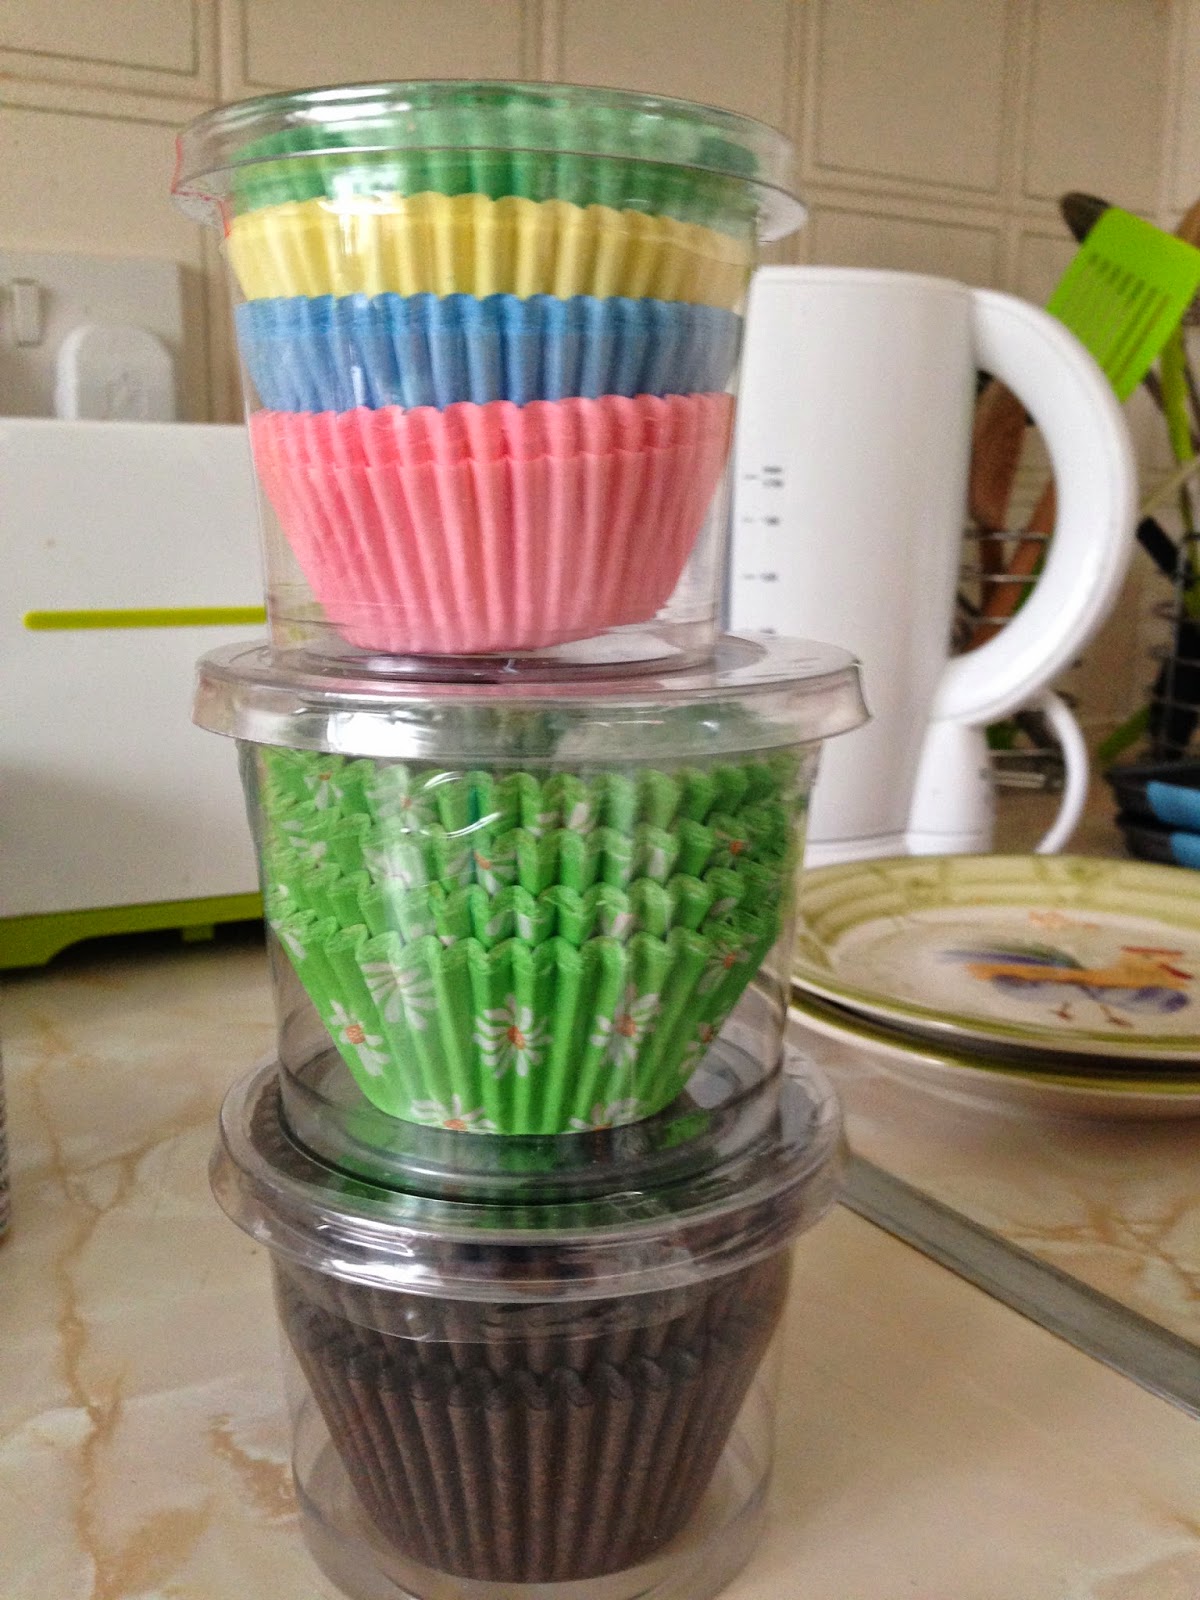
Next up is a load of cupcake cases. ASDA again! We have here a selection of multicoloured pastel small cupcakes cases, next some beautiful green larger cupcake cases with lovely spring daisies on, and some chocolate coloured muffin cases :)


You guessed it, more ASDA. Some lovely star and butterflies& flowers cute decorations to sprinkle on top of cakes and ice cream :)


Disney!!!! Yes, anything Disney gets me quite excited, these two are inspired by Toy Story and Disney Princesses. We have the Fruit flavoured rocks and Sherbet Lemon Rocks, I have tried the lemon ones, but unfortunately they don't have as much flavour as I hoped and really are more for the texture. As far as I know they are on sale at ASDA, but they may be available in other supermarkets or online.


I love bright colours in general, so this lovely orange food colouring will give a lot of fun making my bakes brightly coloured. 


Disney again! these are more muffin cases, we have yet again Toy Story and Disney Princesses. The Toy Story one is white with a repeated pattern of those lovely Aliens. The princess one has I think crowns and seashells and sparkles on. I couldn't not pick these up!


Next, Cinnamon Sticks and Vanilla Pods, I have never used either of these in baking and thought they would be fun to use. That and Andrew really wanted me to buy them :P


And more Disney, (this haul is not in any order!) I have here Toy Story wafer toppers, Monsters Inc and Disney Princess Icing badges to go on top of any cupcakes I make. Disney baking feast I am thinking!


Next up! Bird's Strawberry Trifle. The reason why I picked this up? I used to have this quite often at home when I was little, but not recently as I always thought it wasn't vegetarian...


I turned the box over and found this glorious symbol saying that this box mix I have avoided for a while, has in fact no gunky gelatine!


Now this one is peculiar, no idea whether I will use this or not, I kind of picked this up on a whim! This is Sweet and Salty popcorn seasoning, they have a few more such as Chili and Lime and Chocolate but this seemed to be the only one intriguing to me. Like I said, no idea whether I will use this but it seemed fun!


Next up some quick Jel by Greens. Here we have an orange and red ones. They looked so appealing on the shelf and maybe it will spur me on to make some flans of some kind. I really fancy some more fruit in my diet!


Hand Whisk! under £5 so I don't expect it to be brilliant. I haven't used this yet, but I am hoping this will make baking sometimes a lot easier. I am not likely to use it all the time, as I like the old school method of using your muscles, but as I have very tiny/ none at all, this will come in handy for poor weakling Laura!


YUPPP!!!! This is what you see before you! Minion cupcake mix! Now I am not a big fan of buying cupcake mixes and prefer to make things from scratch on principal. But sometimes they look so tempting! This one in particular. I am hoping to either make these or give them to my sister to make for her birthday as she loves Despicable Me, a franchise that I am only just getting into!


Vegetarian Gel! No idea what to use it for... maybe make myself my own veggie sweets. But I am sure it will come to be useful having round the kitchen!


Few more packet mixes, Angel Delight for Andrew, Butterscotch flavour. I prefer the strawberry flavour. And some Custard mixes because why not, I think Andrew wanted to do something with them to be honest.


Now this was a find! Mango Jelly! and vegetarian! I was so glad to see something like this available. I love Mango's, and although I don't love jelly, I have been dying to eat... well slurp some because it has been so long. I assessed the packaging and on the front there was a small green box with a green circle in and underneath it said 100% Veg. I double checked on the internet and found the symbol is used I think in India. I found out that all products have to be labelled from 2011 to say whether they are vegetarian or not basically. Which is pretty awesome, I think they should be a bit more regulated in the UK with labelling, because it isn't always clear sometimes.


Okay so that's all folks! If there is any products you would recommend for baking let me know, plus let me know if you have any ideas for any of the baking stuff in brought :) Let me know what baking stuff you have been buying too :)


Back into baking?

Okay, so it has been a long time since I have been on here, multiple reasons. One of them seems to be that I have had not much motivation to do any baking recently. I have been trying to rectify this for months now, with not much luck. But I am aiming to get back into baking and blogging. I have missed so much doing both and have been focusing a lot on other projects such as my BookTube channel on YouTube. I am hoping to try and do a balance of both and just get generally more motivated in general. I have two posts coming your way: this one, recent bake pics and a baking Haul :) I hope you enjoy :)


Most recent bake is this Cinnamon Flapjack in a heart shape from today, not my best and a rather simple back. I used the recipe I have mentioned before in my blog, but just threw in a load of cinnamon and didn't double up the mixture. The heart shaped tin I got from ASDA for about £4 around Valentines Day. I can't wait to use that tin for cakes and other bakes. As to the Flapjack, it was a bit too crumbly but according to Andrew nice and cinamonny. :)


Next up is the Calzone pizza. We didn't plan on doing a calzone, however... we have had a lot of issues with this flat, with mould and damp specifically, and my lovely pizza stone had to be chucked away because it was covered in mould :( We are at present looking to move out and with this hopefully getting another pizza stone. This was a yummy pizza, it did end up leaking a bit after we put it in the oven, typically it was my side that leaked and not Andrews! The above picture is just before it went into the oven.  


The above picture was taken in the middle of making some Lime flavoured cupcakes. If I remember rightly I accidentally doubled the amount of sugar that was suppose to be in them, not realising the other lot of sugar was for the frosting. FACEPALM! I used just some Lime juice for the flavouring but in a large quantity to give it a good kick of Limey goodness. The picture below is the cupcakes at the end, not decorated in any fancy way but just with some simple icing with Lime flavouring and some Lemon sherbet rocks on one of them. There was about 12 cupcakes, but Andrew loved them and kept scoffing them! Haha. He enjoyed them so much, I ended up baking another batch. I have always thought it unusual that Lime is not as often used in baking cakes as Lemon. So as someone who loves Lime, if anyone has got any recommendations for baking with Limes (not as much Lime Curd), it would be much appreciated :)


Next up is another Ice Cream Bread conception. This one didn't work as well as others, I think that was because there was too many ice crystals in the ice cream causing too much of the mixture to be water rather than ice cream. It was yummy all the same.


Next up, stuffed crust pizza! This one was a cheese stuffed crust, yummy :)


Next up is cake! I actually have no idea what type of cake this was, I am guessing the usual favourite, cinnamon cake. I dusted this one over with icing sugar. 


Thanks for reading and stay tuned, hopefully new posts soon :)

Friday 7 March 2014

Old Bakes 2

So, as I have posted or baked for that matter in a while, I have had a quick look into previous bakes for you guys again. I may be just distracting myself from an essay, but have an awful cold...anyway rambling! So this one is THREE CAKES with lots of pictures, from a couple of years ago.

Okay, so this first cake is a bit of a weird one, I was being quite experimental, it was made for Andrew, but I can't quite remember the occasion. So this Cake is two different halves, the bases of the cake is a normal sponge but with a twist. One layer was made with Aero Chocolate Orange Bubbles and the other with Aero Chocolate Mint Bubbles. The Icing and filling I will take a guess as to being buttercream icing, one with green colouring the other with chocolate mixed in. The decoration was piped, as you can see not that handy with a piping bag. I also topped the cake off with Mint MatchMakers too! It was a very weird tasting cake if I can remember, it was nice but I think some of the flavours didn't come through well. It had a very nice soft airy texture though!


Next cake! So this I don't think was baked for any particular reason and the decoration took me by surprise in the end. Just a normal sponge cake decorated with butter icing again. I kind of raided the cupboard to see what decorations we had and came across loads of broken pieces of chocolate, so just kind of plonked them on with some sprinkles and ended up with this! Quite happy with the overall effect it gives!


And the Final Cake!! Now I believe my mum helped keep smooth out the initial buttercream icing base with this, as I made a bit of a mess of it. Now normal sponge most likely, may have had vanilla or cinnamon in to add some flavour. This cake was for a friends 18th birthday.  I was so pleased with the icing of the name as I am normally terrible at that sort of thing. The icing on the side of the cake was not the best so I searched through the cupboards to see what I could do to fix it and came across the chocolate fingers. Not a perfect cake, but yet again another cake I was proud of. 


Saturday 4 January 2014

Baking Christmas Haul

So, yes I have been a stranger to blogging for a while now! I have been snowed under, not literally, no snow on this side of the world! But University work has been getting the better of me and I have been stressing over uni reading and the likes of essay after essay. Christmas has gone and I have failed to do any of the baking or crafts I have wanted to, and so has New Year! So one of my 2014 resolutions is to get my life back together, no more sitting down at the end of the day and realising I have accomplished nothing whatsoever. As part of this I want to go back to doing what I enjoy...baking. So this year I hope to go to back to baking with a storm! And with this there is hope for more blogging and more yummy food for me and Andrew to eat!

To start of my back to blogging for 2014, I would like to share with you guys a small haul of baking and kitchen goodies I received for Christmas. :)


One of the presents I got this year was from Andrew's Parents and that was a Cookie press, see below. This looks really exciting, the Stamps all say different things: one says 'Eat Me' with a star on which I think will be perfect for an Alice in Wonderland themed bake, another days 'Baked With Love' with a heart on, I am thinking this will be good for Valentines Day and My 4 years with Andrew is looming soon! Perfect for those events I think! The last one, which you can't see in this picture because it is already on the wooden stamp, says 'Home Made' with a picture of a house, which is really lovely and can be used for any sort of bake. I believe this item was purchased from Wilkinson and it is a very lovely set of stamps, perfect for anybody who likes making biscuits and cookies. I can't wait to try this out and obviously eat some very yummy food! I will let you know how these turn out :)

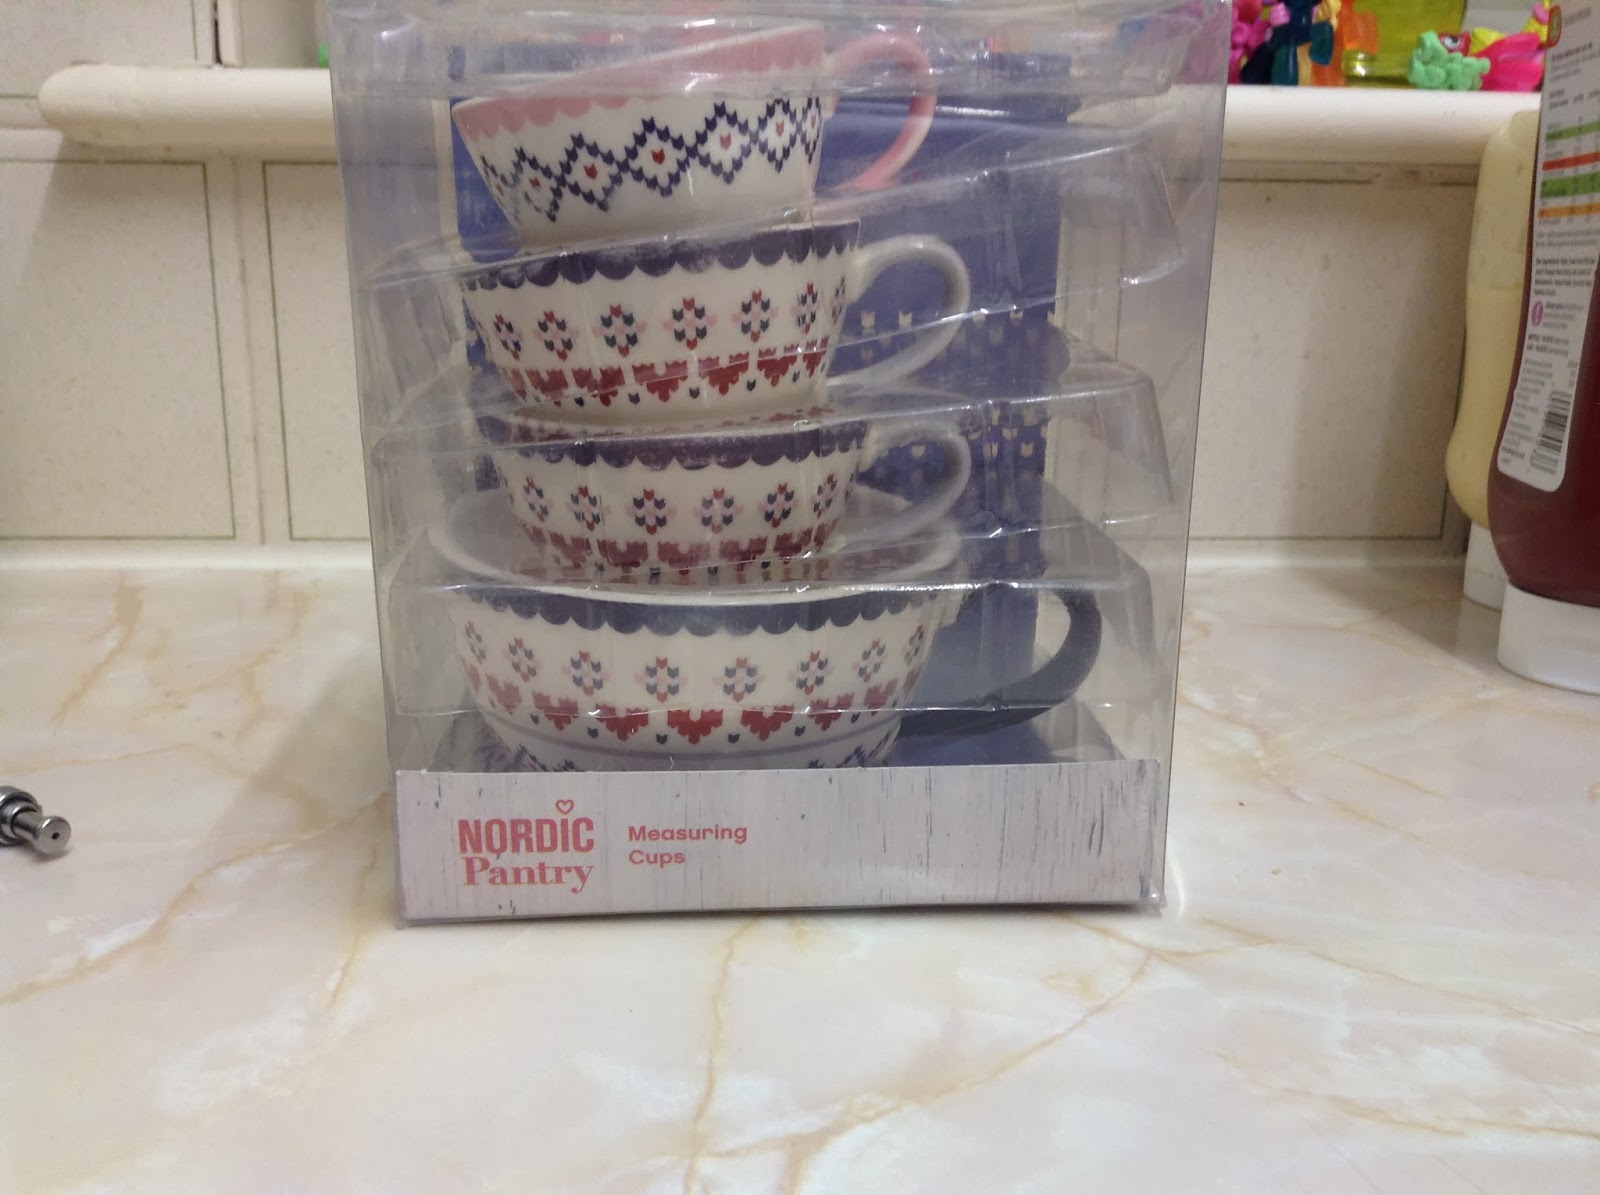
The next item I received only a few days ago was from my friend Belinda, and that is these beautiful measuring cups! Now the only measuring cups I own are some cheap plastic green ones from PoundLand so these are perfect for me. I often look for recipes online which means some are not metric measurements, so this allows me to easily measure out ingredients without the awfulness of trying to convert them. What I love even more about these is the beautiful Nordic design and instead of plastic these are made with china which means they are a lot more stronger. Also inside the cup, there is in small black print at the rim, the cup size. If interested in these they were purchased from Sainsburys. All in all, these will be very much loved and used and are a beautiful addition to my kitchen and baking equipment :)


The next item is even more useful than the last, in all respects. I am ready to chuck out my awful PoundLand scales that were a nightmare to read off and would fall over if you put too much weight on it anyway. I had an awful experience once, of a bowl full of sugar falling on the floor. Lets just say I don't want to have to go through the nightmare of cleaning up sugar off the floor again! BUT now I don't have to, My Auntie Kathryn brought me a beautiful ColourMatch set of scales. Now no more mess or hassle, I can get the exact measurements like the OCD me loves to do. Also there is no need to constantly be cleaning bowls between measurements because I can now just pile it all in one bowl by resetting the scale back to zero for a new ingredient at the touch of not even a button! The whole thing is touch sensitive, which I can't decide whether I will love or hate. I think it will just take some time to get used to it. One good thing about this also is that I can change unit really easily, so like above, no more annoying conversions! The colour is lovely and goes with my kitchen and the glass like top, makes for a lovely shine. If you are interested in this one, I have a feeling it is from the Argos Colour Match range. This will definitely get some use in my kitchen! 


The next two items I received for Christmas were from my mum, I believe she got these from Lakeland, who with the 50th Anniversary of Doctor Who brought out a large range of doctor who themed baking merchandise. My mum got me the two sets of Doctor Who Cookie cutters they were selling, these include a Dalek, Sontaran, Weeping Angel and Tardis cutter.  I almost said cyberman there, then again I am use to when there is a Dalek about, for a Cyberman to not be far behind. This will all be really fun to use and perfect for sitting down and watching Doctor Who with. You never know, these could save the day, like Jammy Dodgers did not so long ago :) Looking forward to using these! 

Another Item Andrew's parents got me, was this beautiful and yummy looking cupcake book :) I have seen this book before when I was working at WhSmith, but never picked it up. There are some beautiful looking cupcakes in this book and some very yummy recipes that I am dying to try out and share with you guys! There is also information about icing, techniques and more. So I think this will be a very useful book and provide some very very yummy cakes to eat for me and of course Andrew, who will no doubt scoff them all! 


The next and last item is from my mum again. Now this item when I unwrapped it, I have to confess I had no idea what it was. All I saw was a very cute green dog. But then my mum explained, this is a oven grip. Now although I may not use this as much as the scales. I completely adore this. And it is green! One thing I love about this is the way you put your hands in the grip and open the dogs mouth like a puppet. Me and Andrew have had lots of fun snapping the dogs mouth at each other like little kids with a new toy! I have to admit I sort of love the sound the grip makes when you slap the rubber bits of the dogs mouth together haha. I am a little weird though. I love this novelty grip and although may not use it as much as the scales, the little green fellow is very much welcome in his new home. Below is a few different pictures showing what the grip looks like from different angles so you can get an idea of the object as a whole, and just because this little thing is so very awesome. I have a feeling my mum may have also purchased this from LakeLand too :)


Hope you enjoyed my latest blog post, and can't wait to be posting more to you guys soon. I hope you all had a great christmas and that 2014 is a good one for you, and you bakers and crafters out there, Keep up the Good Work :D